We offer a wide collection of free, high-quality printable coloring pages for kids and adults. From cute animals to intricate mandalas, our designs bring creativity and relaxation to everyone. Download, print, and start coloring today!
Dragons aren’t real, but your drawings of them can be. Whether you’re a complete beginner picking up a pencil for the first time or an artist looking to add mythical creatures to your repertoire, learning how to draw a dragon opens up a world of creative possibilities.
I know the frustration of staring at a blank page, wondering where to even begin with something as complex as a dragon. After years of teaching fantasy art and helping thousands of students master this skill, I’ve developed a foolproof system that breaks down dragon drawing into manageable steps.
As a professional fantasy artist with over a decade of experience, I’ve worked on everything from children’s book illustrations to game concept art. Our team has created this comprehensive guide that goes beyond basic tutorials – this is your complete dragon-drawing curriculum with detailed breakdowns, professional techniques, and insider tips you won’t find anywhere else.
Here’s what you’ll master by the end of this guide: • Different dragon styles and how to choose yours • Essential dragon anatomy from skeleton to scales • Professional techniques Includes realistic detailing techniques • Engaging poses and striking compositions • Suitable for both traditional and digital art styles
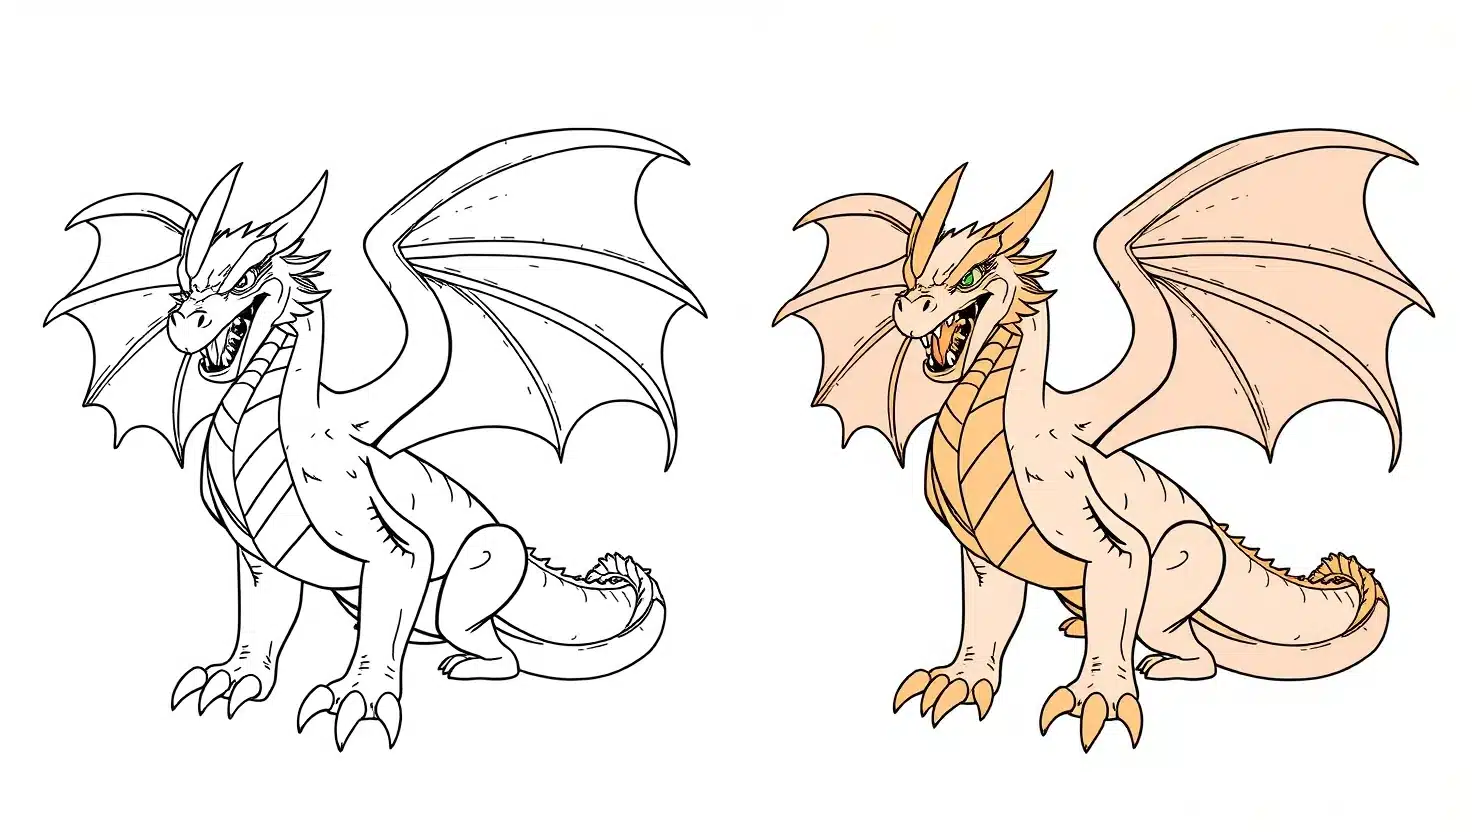
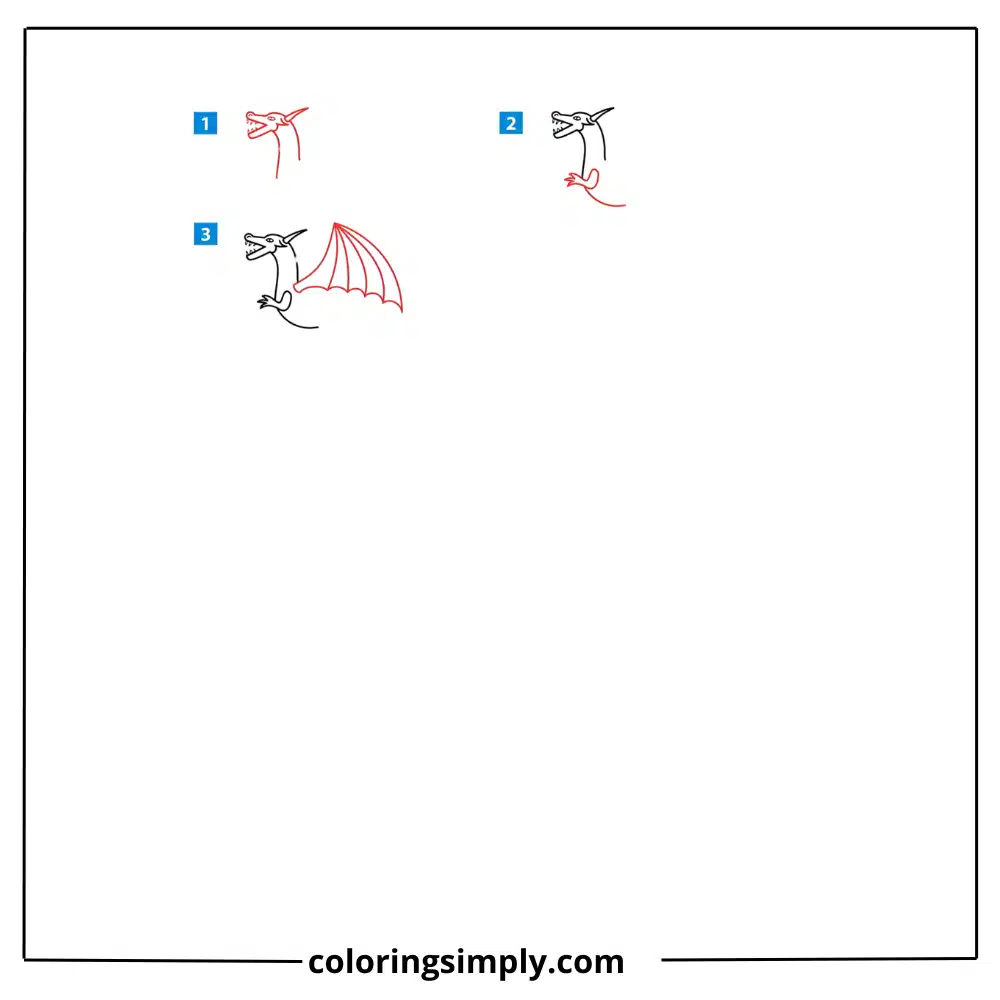
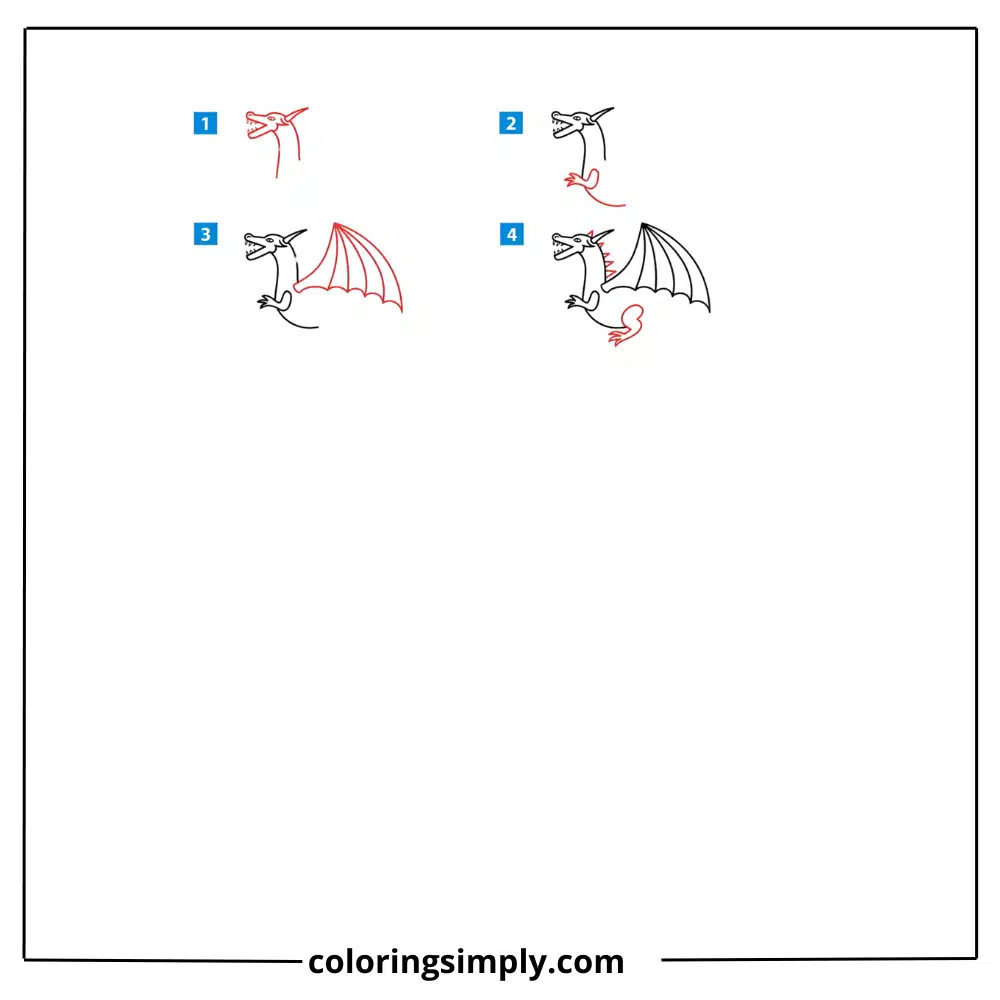
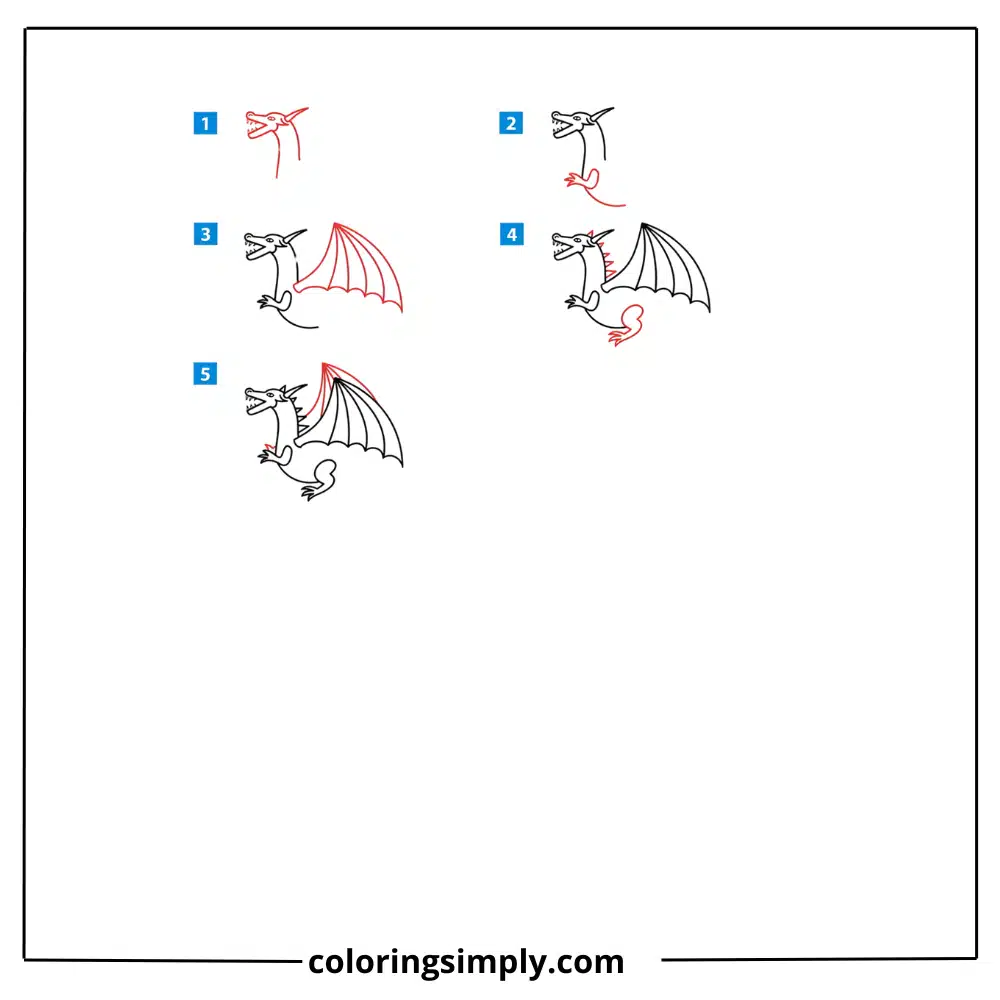
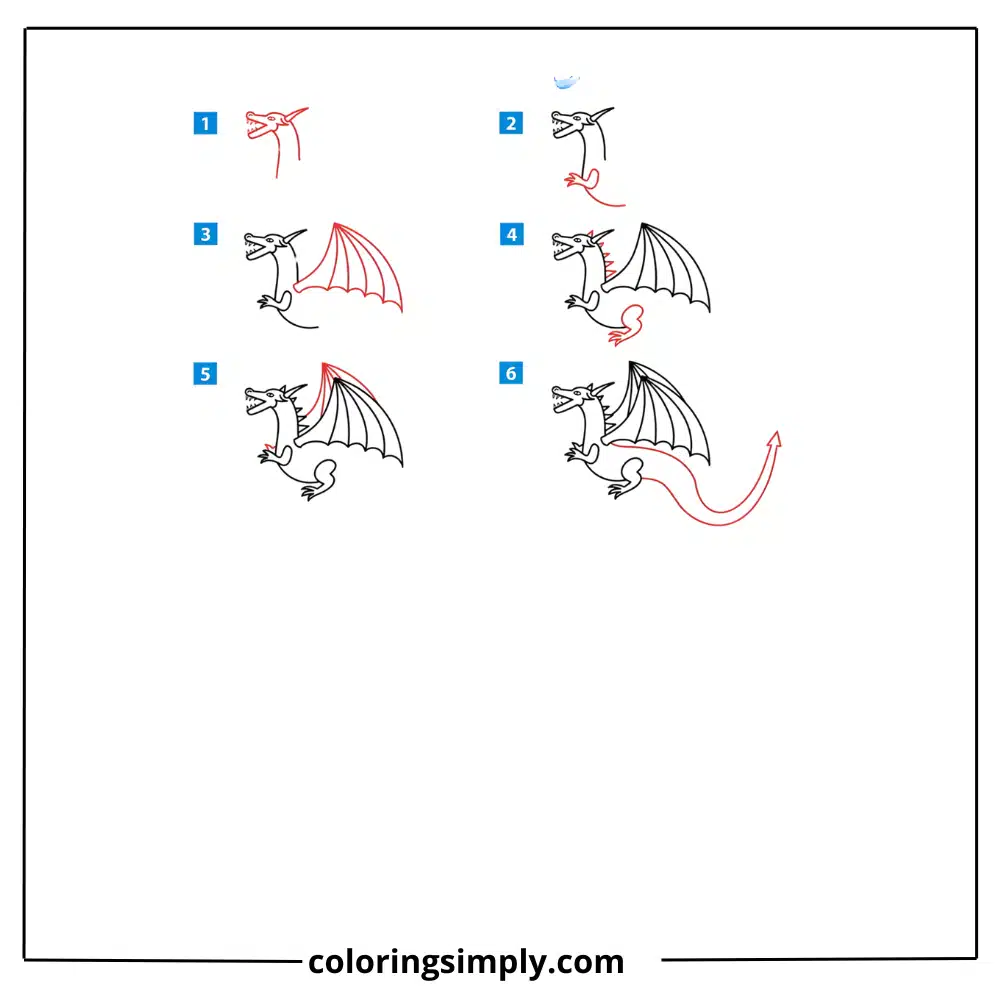
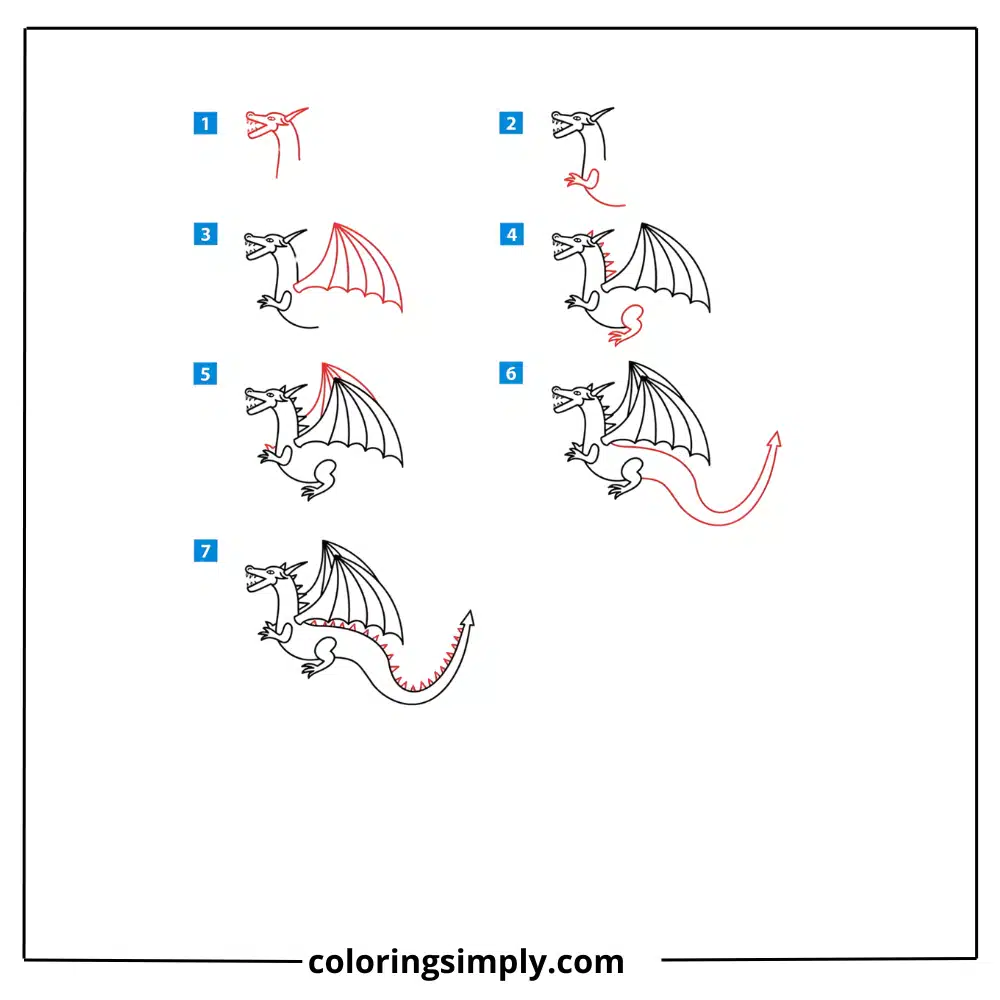
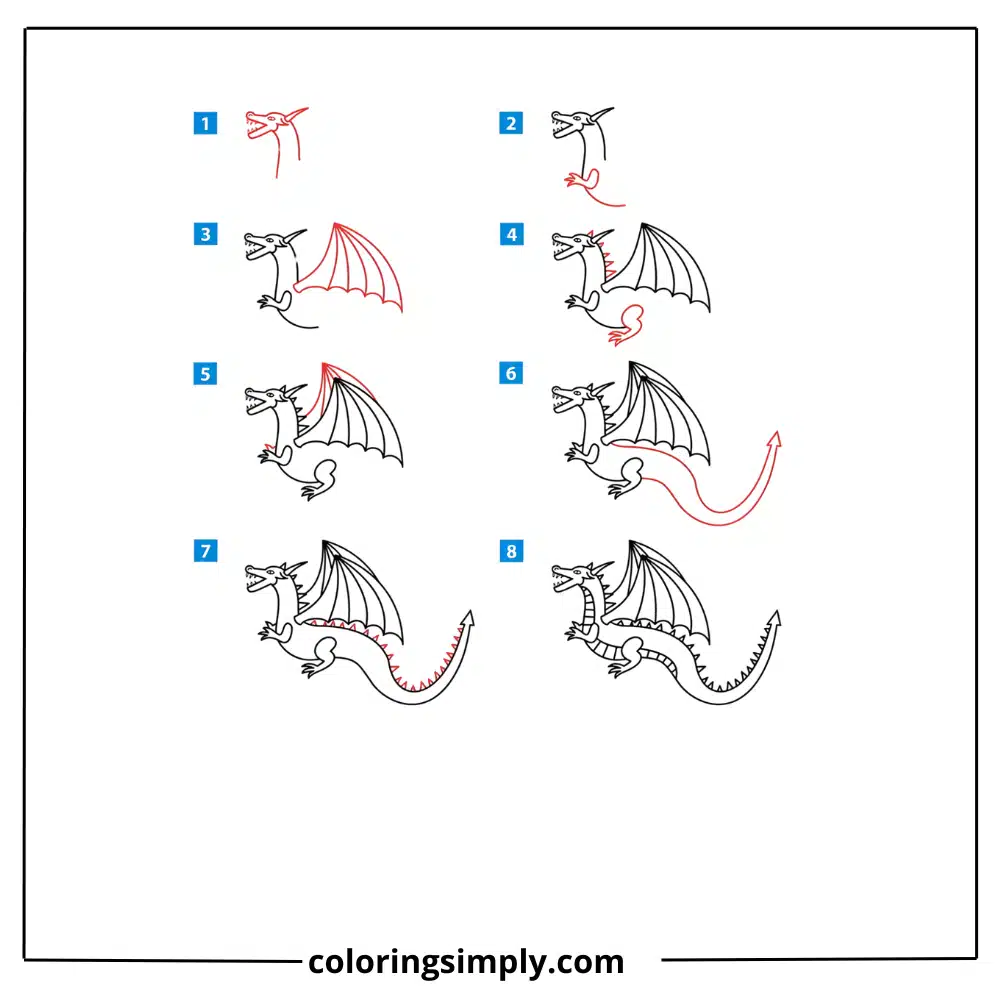
How to draw a dragon step by step
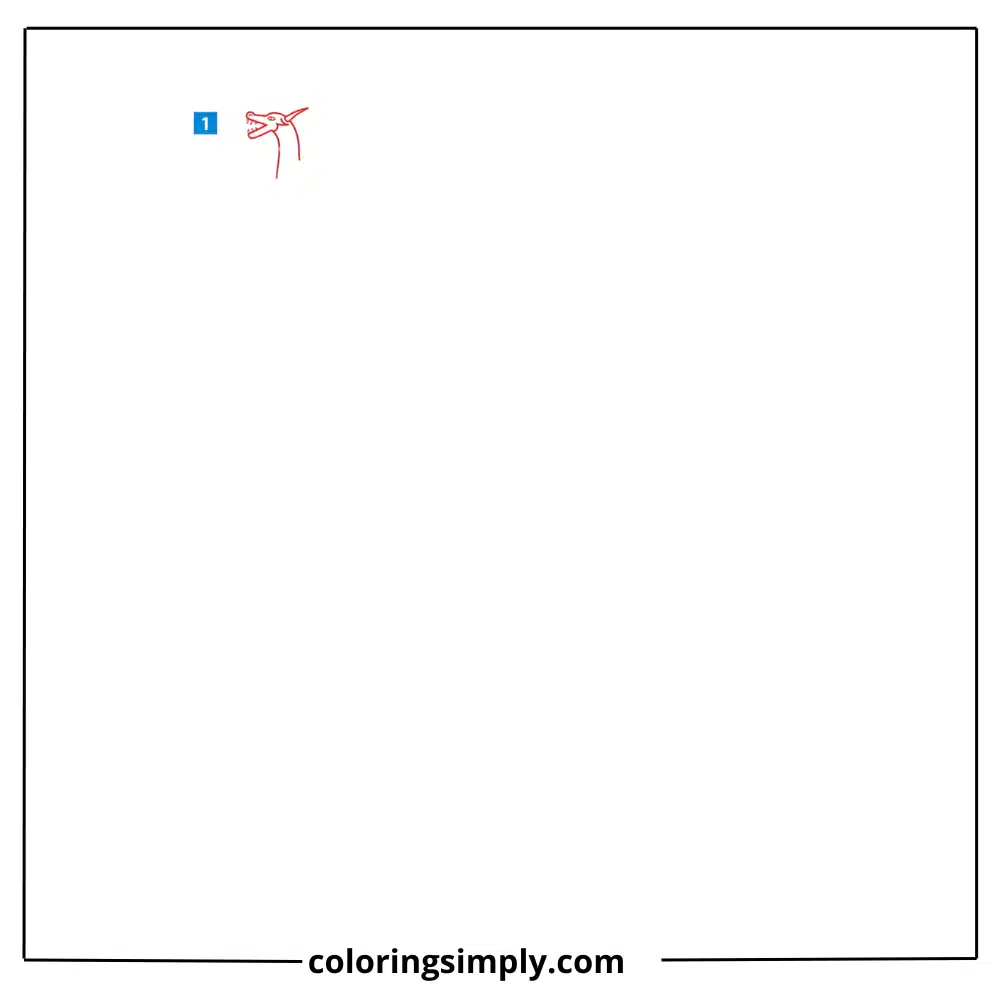
how to draw a dragon step 1
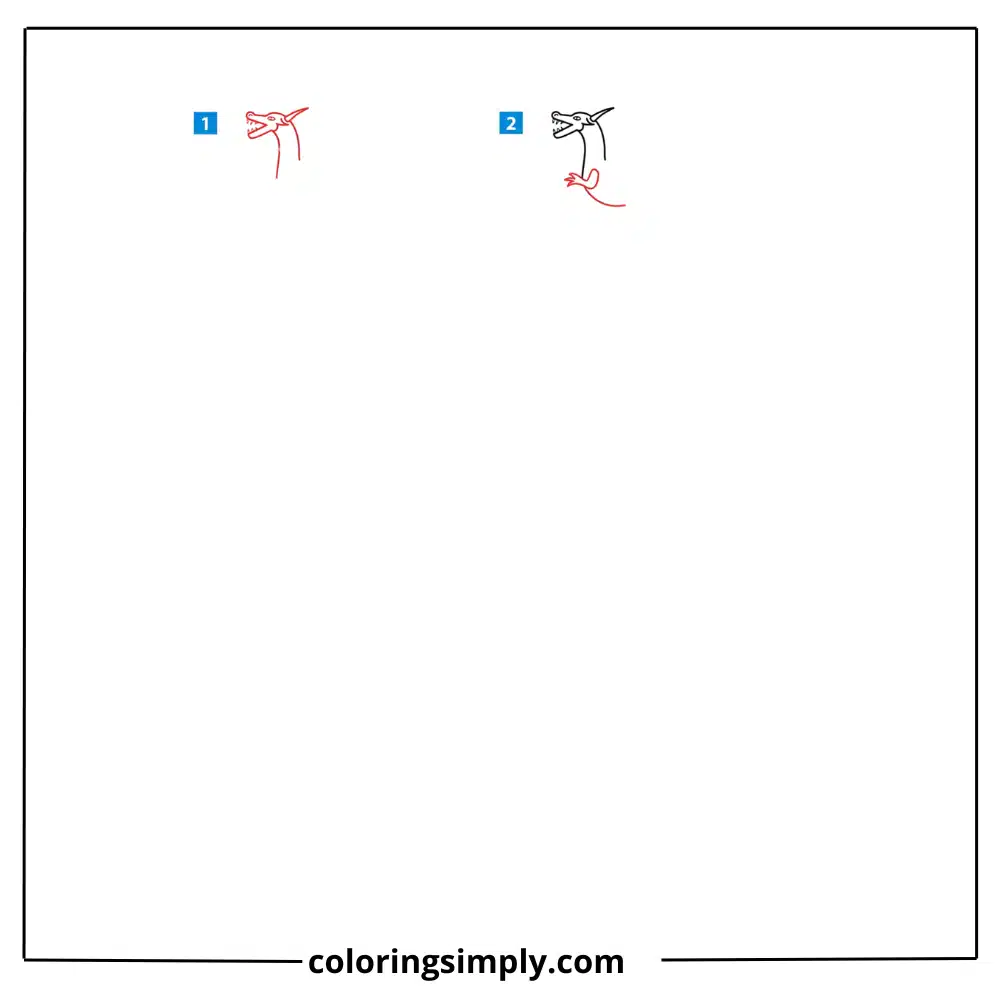
how-to-draw-a-dragon-step-2
how-to-draw-a-dragon-step-3
how-to-draw-a-dragon-step-4
how-to-draw-a-dragon-step-5
how-to-draw-a-dragon-step-6
how-to-draw-a-dragon-step-7
how-to-draw-a-dragon-step-8
how-to-draw-a-dragon-step-9
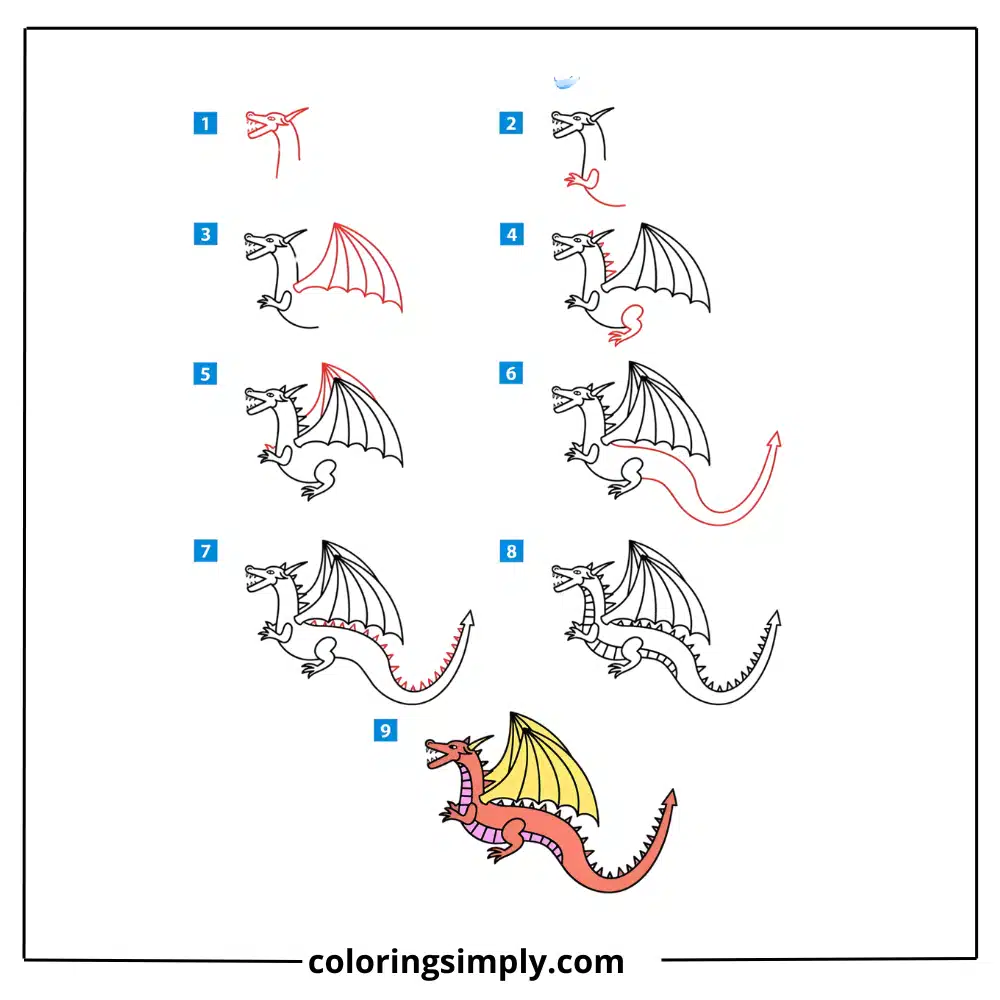
Table of Contents
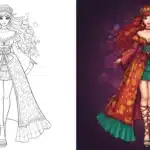
Part 1: The Dragon Blueprint – Choosing Your Style
Before diving into how to draw a dragon step by step, you need to decide what type of dragon speaks to you. This choice will guide every decision you make moving forward.
The Classic Western Dragon is what most people envision – think Smaug from The Hobbit. These dragons are powerful, four-legged creatures with massive wings, long necks, and fierce expressions. They’re perfect for dramatic, imposing artwork.
The Serpentine Eastern Dragon flows like water and wind. These elegant creatures, like Haku from Spirited Away, emphasize grace over brute force. They’re ideal if you want to focus on fluid lines and movement.
The Wyvern simplifies the design with two legs and two wings, making it easier for beginners while still maintaining that classic dragon feel. Game of Thrones popularized this style beautifully.
The Cute/Chibi Dragon appeals to those who prefer adorable over intimidating. These compact, big-eyed dragons are perfect for cartoon styles and children’s illustrations.
The Mecha/Sci-Fi Dragon blends organic forms with mechanical elements, creating something unique and contemporary.
Don’t feel locked into one style – the best dragon artists often blend elements from different approaches to create something uniquely their own.
Part 2: Draconic Anatomy 101 – The Foundation of Great Dragon Art
Understanding dragon anatomy is crucial for creating believable creatures. Think of dragons as a fascinating blend of feline grace, canine loyalty, and reptilian power.
The Skeleton: Your Dragon’s Framework
Begin with the skeleton — it’s the essential framework that supports everything else. A dragon’s spine is incredibly flexible, allowing for those dramatic S-curves you see in flight poses. The ribcage is barrel-shaped and robust, designed to house powerful flight muscles.
When learning how to draw a dragon easy, begin with simple shapes. Draw the torso and head using ovals, place circles at the joints, and use lines to represent the spine and limbs. This basic framework prevents proportion problems later.
The Head & Neck: Where Personality Lives
The dragon’s head is where you’ll convey the most personality. Begin with a simple skull outline—think of an elongated and broadened version of a horse’s skull. The eye sockets are large and forward-facing, giving dragons that intelligent, predatory look.
For the snout, think of it as a combination of a crocodile’s power and a horse’s elegance. The jaw should be substantial enough to look dangerous but not so heavy it throws off the head’s balance.
The neck connects the head to the body with an elegant S-curve. Make it thick enough to support that heavy head but graceful enough to convey the dragon’s serpentine nature.
Eyes are windows to your dragon’s soul. Large, forward-facing eyes suggest intelligence and predatory instincts. The shape can range from reptilian slits to more mammalian rounds, depending on your dragon’s personality.
The Torso & Body: The Center of Power
The dragon’s body houses incredible power. The chest should be wide and deep to support the powerful flight muscles. Think of a lion’s powerful chest combined with a bird’s aerodynamic efficiency.
The spine remains flexible throughout the torso, allowing for those dramatic twists and turns that make dragon poses so dynamic. Don’t make the mistake of drawing a rigid, tube-like body – dragons are all about flowing, organic curves.
The Limbs: Built for Power and Grace
Dragon legs are fascinating combinations of different animal anatomies. The front limbs often resemble those of big cats – powerful, flexible, and built for grappling. The hind limbs are more bird-like, designed for launching into flight and landing with control.
Claws are essential details that many beginners overlook. They should be curved, pointed, and appropriately sized to match the dragon’s proportions. Think eagle talons scaled up to mythical proportions.
Pay attention to joint placement – dragon limbs should look like they could actually support the creature’s weight and movement. Study photos of lions, eagles, and lizards to understand how these joints work in nature.
The Wings: Where Fantasy Takes Flight
Dragon wings are perhaps the most challenging aspect to master, but they’re also the most rewarding. Think of them as giant bat wings – they have a similar bone structure with a thumb and four fingers supporting the wing membrane.
When folded, wings should wrap around the dragon’s body naturally. When extended, they need to look capable of actually lifting your creature into the air. The wing span should be at least twice the dragon’s body length for realistic flight.
The wing membrane connects to the body, usually attaching somewhere along the torso or even extending to the hind legs in some designs. This attachment point is crucial for making the wings look integrated rather than just stuck on.
The Tail: Balance and Expression
A dragon’s tail serves multiple purposes – it’s a counterbalance for flight, a weapon, and an extension of the creature’s emotional expression. The base should be thick and muscular, tapering to whatever end design you choose.
Tail endings vary widely: spaded tips for classic dragons, clubs for more aggressive designs, fins for aquatic dragons, or simple tapered points for elegant styles. Choose based on your dragon’s personality and environment.
Part 3: Bringing Your Dragon to Life – Details & Textures
Once you have the basic anatomy down, it’s time to add the details that transform your sketch into a living, breathing dragon.
Scales: The Dragon’s Armor
Learning how to draw dragon scales intimidates many artists, but it doesn’t have to be overwhelming. Start simple – imagine your dragon is wearing chain mail made of overlapping oval shapes.
For the simple approach, suggest scales with light parallel lines following the body’s contours. This technique works beautifully for distant views or when you want to focus attention elsewhere.
For detailed work, draw individual scales starting from a central line and working outward. Vary the size – larger scales on the back and sides, smaller ones on the belly and joints. Remember that scales follow the muscle structure underneath.
Skin & Texture Variety
Not every part of your dragon needs scales. Wing membranes are typically smooth and leathery, like bat wings. The belly might have larger, softer scales or even smooth skin like a snake’s belly.
Add character with wrinkles around joints, battle scars from ancient fights, or unique markings that tell your dragon’s story. These details separate professional-looking dragons from basic sketches.
Adding Fire and Magic
Fire breath is iconic, but it’s also tricky to draw convincingly. Start with the basic teardrop shape emerging from the mouth, then add internal flames with flowing, organic curves. The hottest part should be near the dragon’s mouth, cooling and spreading as it extends outward.
For magical effects, think about how they interact with your dragon’s anatomy. Does magical energy flow along scale patterns? Does it emanate from specific body parts? These details make your dragon feel more integrated and believable.
Part 4: Posing and Composition
Static dragons are boring dragons. Great dragon art captures these creatures in dynamic, engaging poses that tell a story.
Perched poses show your dragon at rest but alert, like a cat watching prey. The weight should be distributed naturally across the perch, with wings either folded or partially extended for balance.
Flying poses are dramatic but challenging. Remember that dragons are heavy creatures – their flight should look powerful rather than effortless. Wings should be positioned for maximum lift, and the body should have that forward momentum.
Roaring poses are perfect for showcasing your dragon’s fierce nature. The head should be thrown back slightly, neck extended, and you can see down into the throat. This pose also gives you a chance to show off those impressive teeth.
Sleeping poses reveal your dragon’s more peaceful side. Curled up like a cat, wings wrapped around the body, or stretched out in a sunny spot – these poses make dragons feel more relatable and less intimidating.
Tools & Mediums: Traditional vs. Digital
Your choice of tools affects your dragon’s final appearance significantly.
For Traditional Artists, I recommend starting with a range of pencils from 2H to 6B. The harder pencils (2H, H) are perfect for initial sketches and light details, while softer pencils (2B, 4B, 6B) create rich, dark lines and dramatic shadows.
Quality paper makes a difference. Select a surface with enough texture to grip graphite, yet smooth enough to allow for fine details. Bristol board or heavyweight drawing paper work excellently.
For Digital Artists, software choice depends on your style and budget. Procreate is fantastic for beginners and offers incredible value. Photoshop offers advanced, professional-grade tools, but it comes with a more challenging learning curve. Clip Studio Paint sits beautifully in the middle, offering great features at a reasonable price.
Custom brushes can revolutionize your digital dragon art. Scale brushes, texture brushes, and fire effect brushes save hours of work and create more convincing results than manual techniques.
Your Turn to Create!
The best way to improve at dragon drawing is to practice consistently and get feedback from other artists. Every dragon you draw teaches you something new about anatomy, proportion, or technique.
Begin with basic poses and slowly progress to more detailed and complex compositions. Don’t worry about creating masterpieces immediately – focus on understanding the fundamentals and building your skills systematically.
Remember that every professional dragon artist started exactly where you are now. The difference between beginners and experts isn’t talent – it’s the willingness to keep drawing, keep learning, and keep pushing creative boundaries.
Conclusion & Next Steps
Learning how to draw a dragon is a journey that combines technical skill with creative vision. You now have the essential skills to create captivating dragon art—from grasping various styles and mastering anatomy to adding realistic details and designing dynamic poses.
The key is consistent practice combined with continuous learning. Start with basic shapes, focus on getting the anatomy right, then gradually add complexity and personal style. Don’t rush the process – every line you draw is building toward your next breakthrough.
Your dragon drawings will improve dramatically as you apply these techniques. Remember to study real animals for anatomical reference, observe how professional artists handle challenging aspects like wings and fire, and most importantly, have fun with the creative process.
The world needs more dragon art, and now you have the tools to contribute something uniquely yours to that legacy. Pick up your pencil or stylus, choose your dragon style, and start creating the creatures that have captured human imagination for thousands of years.
Ready to take your dragon art to the next level? Keep honing these basics, and feel free to explore your own creative twists. The best dragons come from artists who understand the rules well enough to break them creatively.